How to Claim and Create your Apple Map Listing
 |
May 28, 2019
|
May 28, 2019
I recently visited a client of mine and tried to use my iPhone to pull up directions to their office. Despite looking for them directly by name, I couldn’t find their listing. This can be frustrating for anyone trying to visit your office, and could potentially cost you business. But fear not, the fix is very simple and takes less than ten minutes.
- If you have an Apple ID, use that to login here: https://mapsconnect.apple.com/. If you don’t have an Apple ID, you can create one on the same page.
- Click the “Add Place” link. Enter your business name and location.
- If nothing shows in your search, create your listing and fill out as much information as possible.
- If you do have a listing, click into the profile and “Claim this place.” Update and add any relevant business information.
- Verify through a phone call. *NOTE: your listing will not be visible on Apple Maps until you’ve finished verifying.
Here’s what your finished product will look like:
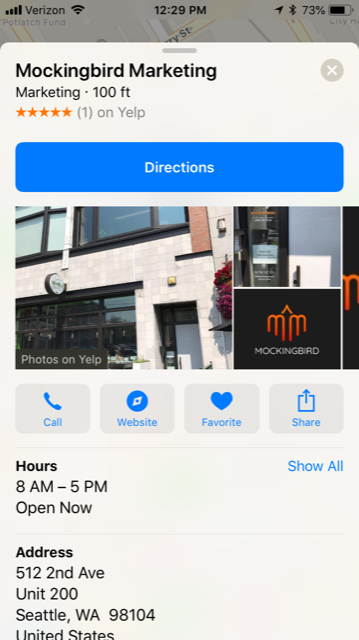
As you can see, Apple Maps also pulls information from Yelp, like your reviews and photos. So, make sure you add your Facebook, Yelp, and Twitter accounts, if you have them.
Not only is it important to have an Apple Maps listing for your potential clients to find you and share important details about your business, but this is also the information that’s shared when someone does a voice search using Siri.