Email Marketing with Mailchimp: 3 Steps to Success
 |
July 6, 2017
|
July 6, 2017
MailChimp is pretty intuitive, but can still be intimidating for the uninitiated. If you’re considering using MailChimp for your own email marketing, here are 3 steps you’ll need to be familiar with as you get started, as well as a random assortment of helpful information to help guide you along the way.
1. Choosing Your Plan
Before you start blasting out tantalizing email campaigns, you need to choose a plan. Here are your choices:
- Free plan: up to 2,000 subscribers and 12,000 emails per month. This is a good way to dip your toes in. The idea here is that you’ll start using Mailchimp, like it, and eventually accrue more than the 2,000 subscribers allowed under the free plan, and start paying.
- Growing Business: Once you’ve outgrown the free plan, Mailchimp charges based on number of subscribers (these are people receiving your emails). These plans start at $10 a month and each allows an unlimited amount of emails to be sent. If you come to rely on MailChimp, you’ll end up using some version of this plan. These plans come with increased capabilities such as automation, integration (Salesforce, Sugar, Google Analytics), and targeting.

- Pro Marketer: At an additional $199 per month, you’ll really need to be leaning in to Mailchimp for this to make sense businesswise. This enables e-commerce functionality, A/B Testing, comparative reports and more robust automation.
2. Lists
Once you’ve chosen an account type, it’s time to import your email lists into Mailchimp. Assuming you have a preexisting list of email addresses you want to market to, it’s time to add these emails to Mailchimp in segmented lists that makes sense for marketing purposes.
- Within Mailchimp, navigate to “Lists” and then “create new list”. From here you’ll be able to set a name, “from” email address, the contact information that will appear at the bottom of the email you send out, as well as notification preferences. Once you’ve completed this step, it’s time to import your email list.
- You can do this by creating an excel workbook that includes the information you want (email, first and last name, generally). If you have trouble, Mailchimp provides some helpful resources.
When building your lists, you want to keep targeting in mind. It’s your goal to give each recipient the experience that most closely matches their interests. For example, if you’re a law firm that practices personal injury and medical malpractice, you’ll want to break your emails up into groups that correspond to each of these interest groups. One list for personal injury, one list for medical malpractice. If a potential client contacts a firm because they’re interested in a certain topic, a quick way to frustrate that person is to send them a bunch of emails about something completely unrelated to what they originally inquired about. The more specific you email lists, the better.
3. Campaigns
Here’s where we get into the bread and butter of getting your email marketing started. Mailchimp will have you customize the following fields: recipients, setup, template, design, and confirm.
- Recipients: this is where you choose the specific list you made earlier. Your lists and campaigns should align nicely.
- Setup: This is where you lay down the backbone of your campaign. Here you’ll add your campaign name, email subject, “from” name and email address, and perhaps most importantly, Google Analytics tracking. Assuming you have Google Analytics on your site, integrating Mailchimp with GA is easy. From the “settings” menu, title your campaigns under “Google Analytics link tracking” how you want them to show up in Analytics. Mailchimp will automatically tag each email with a utm code that uses the name you input here.
- Template: Here you choose the template you want for your campaign. Mailchimp gives you plenty to choose from. These range from templates geared towards selling products, making an announcement, or telling a story. In addition to these categorized templates, there are also more general templates to choose from:
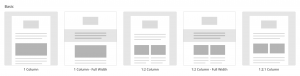 If none of these templates work, Mailchimp gives you the option to code your own templates. It’s a good idea to have a consistent template built out for regular newsletters. This will quickly prove worth your while the next time you send out your newsletter and have a prebuilt framework to go off of.
 - Design: Once you’ve chosen a template, it’s time to make it your own. In “design” you are able to add text, links, images, buttons, videos, color, and more. You can spend as much (or as little) time in this section as you want.
- Confirm: This is where you review your campaign, and schedule its send date and time. I generally try to send emails earlier in the week, and around 10 AM Pacific time.

If you have any questions about how to do this yourself or want us to handle your marketing for you, give us a call.
Glad to see your other blog about email append service.